Using a laser cutting machine is very simple. But as a beginner, it can look quite daunting. There are adjustable settings, files to import, and materials to select. You might find difficulties knowing what to do first, especially if it's wood.
So, here we are to make the work easier for you. Here are seven things to know when cutting wood with laser.
The steps we mention are not just confined to wood. But we will specify wood here. So, do keep that in mind. We would greatly appreciate it if you stick around till the end. As this is going to take a little time to explain.
Let us not beat around the bush. These are the tips you need to know when cutting wood with a laser. Keep a clear head and follow the instructions carefully. Hence, let us begin.
Choosing the suitable wood is a must for your project. Not only that, but the size also matters. Depending on that, you might need a specific laser. Generally, for cutting wood, a CO2 laser is much recommended. Timber comes in soft and hard types.
Softwood is easy to cut and requires less power. But hardwood, like plywood, is tough to cut. Hence, a much higher watt is necessary. After choosing the correct type of wood, you can go to the next tip.
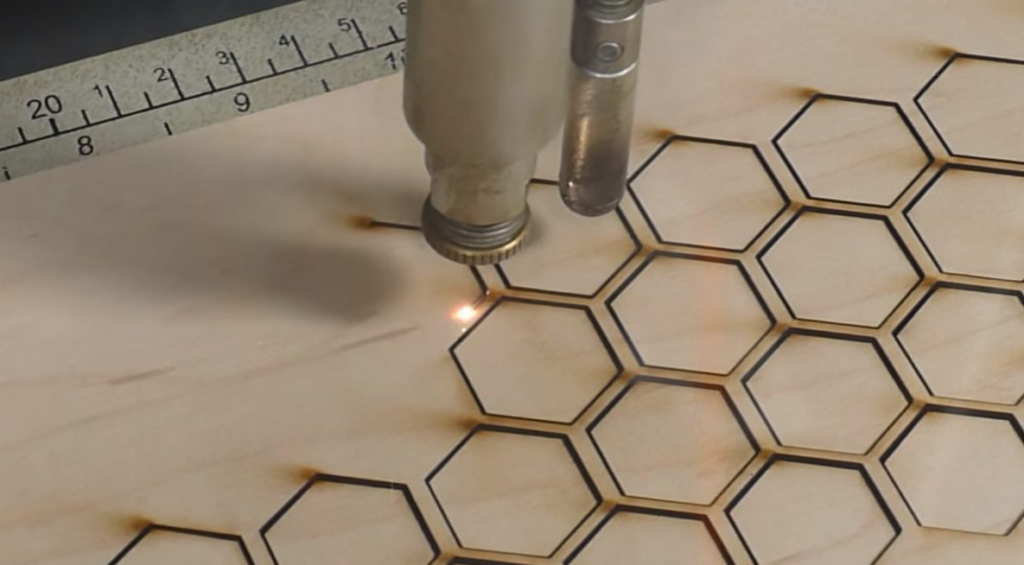
This one is significant. Your slab of wood should fit appropriately on the laser machine. If not, use a knife or saw (depending on the thickness) to cut off the extra piece. Cutting wood with a high-frequency laser can cause burn marks on the edges. So, it is advisable to use painter's tape on the wood.
This will prevent the burning mark on the edges and give a clean finish. Your laser should come with different presets. These presets are adjustable according to your choice as well.
So, please make sure you give proper names to them to remember which presets are what. For example, for an 8 mm thick plywood, you name a preset ‘’Plywood 1’’. So hopefully, you understand.
Creating and choosing the correct file format depends on your project too. A laser can read two file formats: the raster and the vector type. Raster is a 2D file format that gets pixelated if zoomed too much. On the other hand, vector files remain smooth even if you zoom in quite a lot.
Raster images are imported from software like Adobe Photoshop and vector images from AutoCAD. Both types are efficient in their uses. For engraving devices, raster files are mainly used. The laser slowly hinges left to right to give off a burning mark. And vector images are typically used to slice off the wood completely.
So, check your material and project type to make the correct file format.
If your project has letters or numbers, you need to use vector images. Make sure to use big fonts and proper spacing between each letter. We would also advise you to use STENCIL fonts. They have links created automatically.
Remember that your letters are also in that image format the laser can understand. Also, use a vector line at the outline of each font. This will give you an intense sharpness around them. So, creating links in and out of the texts is of paramount importance. Hence, you easily download these STENCIL fonts from the internet.
Your project might require much cutting. So, to be more efficient, follow this. Instead of creating more files, just make more layers in a single file. You can control the laser on which line to follow and cut. So, that won't be a problem.
Most graphics software will allow you to create different layers in one file. So, you can use the first layer to cut, the second layer to engrave, and so on. Turn off printing after each layer, so nothing gets overlapped. And so, your laser should start cutting the way you want it.
As you know you can use different types of wood for your wooden project. Therefore, might need some polishing and joining to do. And that's why we suggest you create some nodes on the wood you're cutting. Timber comes in different sizes and shapes. Hence, make at least two to three nodes on every two sides.
The nodes will help you join the planks quickly. As a result, this will give your final result a bit more rigidity. Make sure to use a vector file in this case. Because the nodes should be smooth and sharp around the edges. So, use this technique as much as you can.
Your laser should come with a laser pointer. This is a great way to test your materials and their cutting process. Just turn off the power. Then observe where the arrow goes throughout the wood. You might see some errors here and there. Hence, you can fix them by editing the image format.
The red dot is perfect for tracing vector lines. But we do not recommend this process for raster files. Because, in the case of the raster, the laser tends to move from left to right. So, do keep that in mind while using the red dot.
So, to sum it all up, there are seven essential things to know when cutting wood with laser. Choosing the right type of wood comes first. And then prepare it for cutting. After that, you have to create an image file for the cutting process.
So, choose the correct one. Then prepare your texts, make multiple layers, and craft proper nodes.
Finally, give a test run by using the red dot and observe. And fix your image file if an error arises. So, we hope that you’ve learned some important things about laser cutting today. We wish to see you soon on our next journey. Till then, take care.